Opening Gmail should feel like checking your messages, not walking into a digital thrift store filled with fake invoices, suspicious “prizes,” newsletters you never requested, and offers that somehow know too much about you. The good news is that Gmail has several built-in tools to help you block unwanted senders, train its spam filter, unsubscribe from legitimate marketing emails, and create custom rules that keep your inbox clean automatically.
TLDR: To block emails in Gmail, open a message, click the three-dot menu, and choose Block followed by the sender’s name. For spam or scams, use Report spam or Report phishing so Gmail can improve its filtering. For recurring unwanted emails, create a filter to delete, archive, or label them automatically. You can also unsubscribe from legitimate mailing lists and review your blocked senders in Gmail settings.
Table of Contents
Why Blocking Emails in Gmail Matters
Spam is more than an annoyance. Some unwanted emails are harmless promotions, but others are attempts to steal passwords, trick you into paying fake bills, or infect your device with malware. Even when messages are not dangerous, constant inbox clutter can make it harder to find important emails from work, family, banks, schools, or services you actually use.
Gmail already uses strong automatic spam detection, but no filter is perfect. Sometimes promotional emails slip into your inbox. Sometimes a legitimate newsletter becomes too frequent. And sometimes a sender you once trusted starts sending messages you no longer want. That is where Gmail’s manual blocking and filtering tools become useful.
The best approach is not just one action. Blocking works well for individual senders, reporting spam helps Gmail learn, filters give you custom control, and unsubscribing is often the right move for legitimate mailing lists.

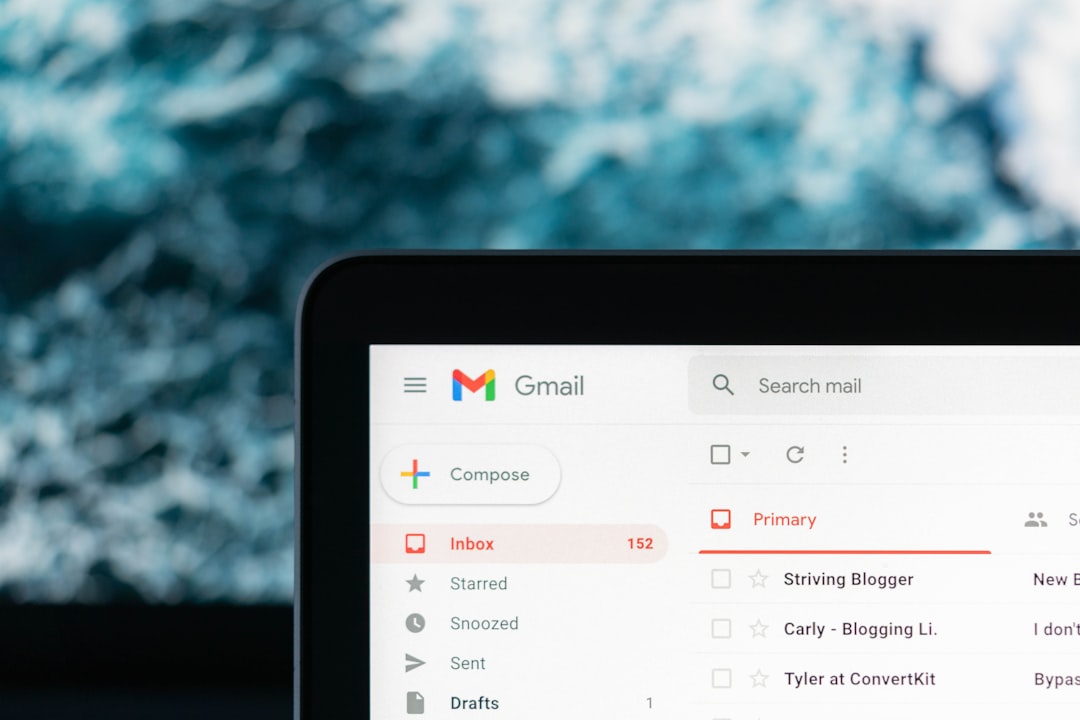
Step 1: Block a Sender in Gmail on Desktop
If one person or company keeps emailing you and you no longer want to see their messages, blocking the sender is the fastest option. When you block someone in Gmail, new messages from that address are automatically sent to your Spam folder.
- Open Gmail in your web browser.
- Click the email from the sender you want to block.
- In the top-right corner of the message, click the three vertical dots menu.
- Select Block “Sender Name”.
- Confirm by clicking Block.
After this, Gmail will send future messages from that email address to Spam. You may still see older emails from that sender in your inbox unless you manually delete, archive, or move them.
Important: Blocking only applies to the exact email address. If the spammer uses multiple addresses or constantly changes domains, you may need to report the messages as spam or create a filter that targets specific words, domains, or patterns.
Step 2: Block Emails in the Gmail Mobile App
You can also block senders directly from the Gmail app on Android or iPhone. The steps are similar, though the screen layout may vary slightly depending on your device.
- Open the Gmail app.
- Tap the email from the sender you want to block.
- Tap the three-dot menu near the sender details, not necessarily the app’s main menu.
- Choose Block “Sender Name”.
Once blocked, future emails from that address should go to Spam automatically. If you accidentally block the wrong sender, you can unblock them later from the same menu or through Gmail settings on desktop.
Step 3: Report Spam Instead of Just Deleting It
Many people simply delete spam emails, but reporting them is more effective. When you click Report spam, Gmail uses that information to improve its filtering system. It can also help protect other users from similar messages.
To report spam on desktop:
- Select or open the suspicious email.
- Click the Report spam icon, which looks like an octagon with an exclamation mark.
- The email will move to your Spam folder.
In the Gmail mobile app, open the message, tap the three-dot menu, and choose Report spam.
Use this option for emails that are clearly unwanted, mass-sent, misleading, or suspicious. Examples include fake prize notices, strange investment offers, unknown shipping alerts, and messages pretending to be from companies you do not use.
Step 4: Report Phishing Emails
Phishing emails are more dangerous than ordinary spam. They are designed to trick you into revealing sensitive information such as passwords, credit card numbers, bank details, or verification codes. A phishing email might look like it comes from your bank, a delivery company, a payment service, or even Google.
Common warning signs include:
- Urgent language, such as “Your account will be closed today.”
- Suspicious links that do not match the official website.
- Unexpected attachments, especially invoices or security documents.
- Spelling or grammar errors in a message claiming to be official.
- Requests for passwords, codes, or payment details.
To report phishing in Gmail on desktop:
- Open the suspicious message.
- Click the three-dot menu in the top-right corner of the email.
- Select Report phishing.
- Confirm the report.
Do not click links, download attachments, or reply to a message you suspect is phishing. Reporting it is safer and helps Gmail identify similar attacks.
Step 5: Unsubscribe from Legitimate Marketing Emails
Not every unwanted email is spam. Sometimes you signed up for a store discount, downloaded a free guide, joined a mailing list, or created an account that includes promotional emails. For legitimate companies, unsubscribing is usually better than blocking.
Gmail often shows an Unsubscribe link near the sender’s address at the top of marketing emails. If you see it, click it and follow the instructions. You can also scroll to the bottom of the email and look for an unsubscribe link, though Gmail’s built-in option is usually faster.
Use unsubscribe when:
- You recognize the sender.
- The email comes from a real company or website.
- You no longer want newsletters, promotions, or updates.
- The message is annoying but not deceptive or dangerous.
However, be cautious. If an email looks suspicious or comes from an unknown sender, avoid clicking unsubscribe links. Some scammers use fake unsubscribe buttons to confirm that your email address is active. In those cases, use Report spam instead.
Step 6: Create Gmail Filters for Advanced Blocking
Filters are one of Gmail’s most powerful inbox management tools. A filter allows you to tell Gmail what to do with certain emails automatically. You can delete them, archive them, mark them as read, apply labels, forward them, or send them to Spam-like storage without ever seeing them in your inbox.
To create a filter in Gmail on desktop:
- Click the Show search options icon in the Gmail search bar. It looks like small sliders.
- Enter your criteria, such as the sender’s email address, a domain, subject words, or keywords.
- Click Create filter.
- Choose what Gmail should do with matching emails.
- Select Delete it, Skip the Inbox, Mark as read, or another action.
- Click Create filter again to save it.
For example, if you keep receiving emails from many addresses at the same domain, you can filter messages from @example.com. If spam messages always include the phrase “exclusive crypto opportunity,” you can filter emails containing those words.
Useful filter ideas:
- Filter emails from a specific domain, such as annoyingdomain.com.
- Delete emails with repeated spam phrases in the subject line.
- Archive promotional emails you want to keep but not see immediately.
- Apply labels to newsletters so they stay organized outside your main inbox.
Step 7: Use Search Operators to Find Spam Patterns
Gmail search operators help you locate groups of unwanted emails quickly. This is especially useful before creating filters or cleaning old messages.
Try searches like:
- from:sender@example.com to find all emails from one address.
- from:(@domain.com) to find messages from a domain.
- subject:invoice to locate messages with a specific subject word.
- has:attachment to find emails with attachments.
- older_than:1y to find old emails you may want to delete.
Once search results appear, you can select all matching messages and delete them, archive them, label them, or create a filter from the search criteria. This is a great way to clean years of clutter without opening every email individually.
Step 8: Check and Manage Your Blocked Senders
If you want to review who you have blocked, Gmail lets you manage blocked senders from the settings area. This is helpful if you accidentally blocked someone or want to clean up your blocked list.
- Open Gmail on desktop.
- Click the gear icon in the top-right corner.
- Select See all settings.
- Go to the Filters and Blocked Addresses tab.
- Scroll to the blocked addresses section.
- Click unblock next to any sender you want to allow again.
In the same tab, you can also view, edit, or delete filters. If your Gmail is behaving strangely, such as important emails disappearing or skipping the inbox, check this section to make sure an old filter is not causing the problem.
Step 9: Strengthen Your Gmail Security
Blocking spam is important, but account security matters too. If spammers or scammers get access to your account, they can do much more damage than send annoying messages. They may read private emails, reset passwords for other services, or send scams to your contacts.
To improve Gmail security:
- Use a strong, unique password for your Google account.
- Turn on 2-Step Verification.
- Review recent account activity regularly.
- Do not reuse your Gmail password on other websites.
- Be careful with third-party apps that request access to your email.
You can check connected apps and account activity through your Google Account security settings. If you see anything unfamiliar, remove access and change your password immediately.
Step 10: Keep Your Inbox Cleaner Going Forward
The easiest spam to manage is the spam you never receive. While you cannot prevent every unwanted email, a few habits can reduce future clutter.
- Use a secondary email address for shopping, coupons, and sign-ups.
- Avoid posting your email address publicly online.
- Think twice before entering your email into unknown websites.
- Unsubscribe from newsletters you no longer read.
- Report spam instead of only deleting it.
You can also use Gmail categories such as Primary, Promotions, Social, and Updates to separate different types of incoming messages. While categories are not the same as blocking, they can make your inbox feel less chaotic.
Blocking vs. Reporting vs. Filtering: Which Should You Use?
Each Gmail tool has a slightly different purpose. Knowing which one to use will save time and produce better results.
- Block: Best for one sender you no longer want to hear from.
- Report spam: Best for junk, mass emails, scams, and suspicious promotions.
- Report phishing: Best for emails trying to steal personal or financial information.
- Unsubscribe: Best for legitimate newsletters and marketing emails.
- Filter: Best for recurring patterns, domains, keywords, and advanced automation.
In many cases, you may use more than one tool. For example, you might report a message as spam and then create a filter for similar subject lines. Or you might unsubscribe from a store’s newsletter, then filter future promotions if they continue arriving.
Final Thoughts
Gmail gives you a strong set of tools for controlling unwanted email, but the best results come from using them deliberately. Block senders when you want to stop messages from a specific address. Report spam and phishing when emails are suspicious or harmful. Unsubscribe from legitimate marketing lists, and use filters when you need more precise control.
With a few minutes of setup, your inbox can become calmer, safer, and easier to manage. Instead of wasting time deleting the same junk every day, let Gmail do the sorting for you. A clean inbox is not just more pleasant to look at; it also helps you spot the messages that truly matter.