It is a fact, we all have encountered the issue of 100% disk usage on Windows in our computers. Some people may discern this error infrequently, but sometimes it becomes severe stress when it transpired multiple times. Although, if you do not know about it, you can see in the Task Manager where you will sometime see a warning in red color saying 100% above the disk tab.
So, when you examine your CPU’s disk usage, and it states that it is 100%, it is inevitable that your PC will get slammed. Also, it is going to weaken your computer’s performance or check FPS (Frames Per Second) with the help of FPS counter. It may also have negative impacts on your PC’s memory and processing power.
Overheating issues could be there, and you may have to hard reboot your computer if the problem is severe. However, most of the time, you may get shed of this hassle after a couple of minutes.
But, if your computer or laptop is coming up with this problem again and again without warnings, you may have to do something regarding it. There are some legitimate ways to solve this error, which you may utilize on your computer too.
So, we here for you again to help solve the issues of 100 percent CPU disk usage on Windows 10 PC. After reading this article, you will get a permanent solution to this problem, which will never let you down again. So, let’s start discussing further.
Table of Contents
Why 100% CPU disk usage on Windows Task Manager [ Red color warning ]?

Most of the time, 100% disk usage on Windows 10 problem occurs due to Advanced Host Controller Interface PCI-Express. Along with this, there could be a severe problem with your HDD.
The issues could be caused by several other problems like Malware or problematic software. So, once you have confirmed that this error is coming up in your computer, you may use Window’s inbuild disk check, which is perhaps the best way to identify and fix this problem.
However, lots of other things may happen, and in this article, we are going to know the most effective ways to solve this problem on your computer.
Tempting Steps: How to fix 100% disk usage on Windows 10 problem?
All the steps we are going to discuss below are thoroughly tested and trusted. However, you are advised to perform all of them under professional guidance. Do these things only if you are aware of what you are doing.
Performing these steps negligibly may cause some other damages to your computers, some of which may be irreversible. However, if you are doing them adequately, it is sure that you will get rid of this problem.
We are supposing that you are using the Windows 10 operating system on your computer. Even if you are using any other Windows system, you can easily find these settings and perform the steps.
1. Do a simple System Restart
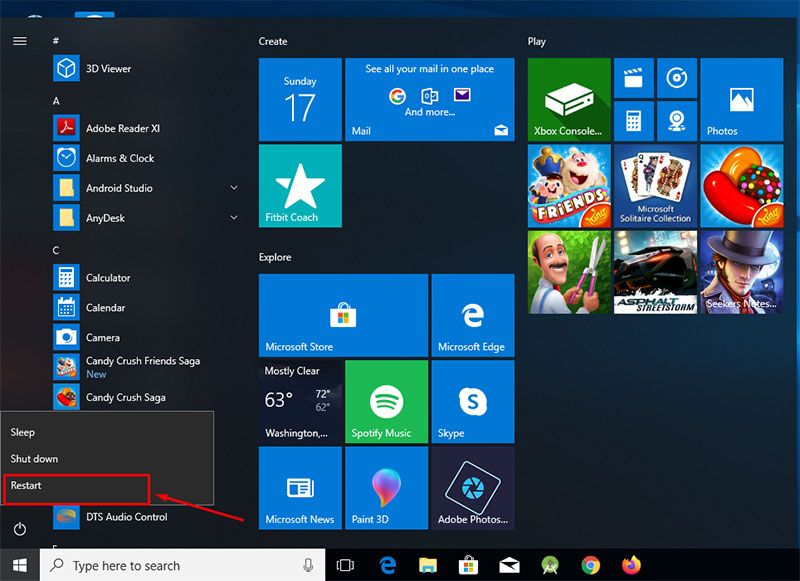
Before proceeding further to any advanced step, it is crucial to give your computer a restart. Many things are going behind the main tasks, so a system reboot may shut most of them and solve this problem.
If this is something related to the memory or software, you will get rid of it after a restart. But, while doing this, make sure to do it by clicking on the Restart option instead of shutting down your computer and then restart it manually. When your computer is restarted, check for the error if it is coming again. If it is still there, proceed to the next method given below.
2. Scan your computer for Malware and viruses
As we discussed earlier, Malware and viruses on our computer are another probable reason for this problem. So, when it comes to finding and deleting them, you must do it before anything else.
For try to fixed the full CPU disk usage on Windows system, you can simply use your Windows defender firewall to run a full virus scan or use any other third-party antivirus software package such as Avast, Norton, MacAfee, etc.
If you find any malicious files on your computer, you must have to delete them permanently from your computer.
Note: Doing a computer scan during this issue might be difficult, or it may take some extra time. So, it is good to let it happen and do not rush things. Make sure to select the full scan and restart your computer after the deletion of all the detected files.
Once you have done all these things, check for the error again. If it is solved, then you are right to do. Otherwise, proceed to the next step.
3. Do a Windows Update
Windows Update itself is capable of solving most of the problems you may face on your computer. A new update always comes along with the latest security patches and bug fixes.
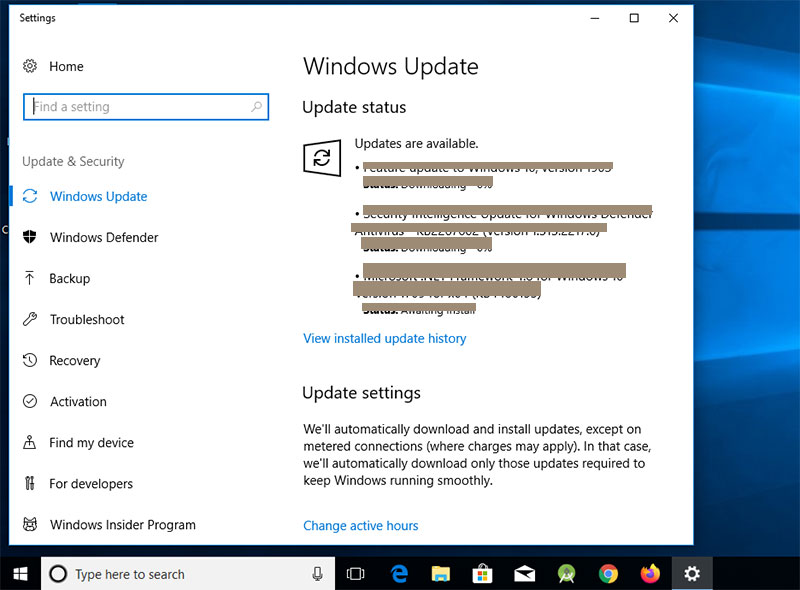
So, if you are facing this issue of 100% disk usage due to an operating system’s bug, you may fix it by just doing a simple windows update. You can check for a new update by following the below-given steps.
- Go to the Windows Search bar and search for “Windows Update Settings.”
- Then click on “Check for Updates.”
If any update is pending, your computer will check for it automatically and install them. Make sure to have a good internet connection to get everything done within less time.
The system will restart automatically after this update, but if it not restarted, do it manually to let the update take its effects.
If you are still facing the disk usage issue even after doing the update, proceed to the next step simply.
Disable Windows Search
As per lots of forums and websites, a popular bug is proved in Windows 10 and 8 that creates a search loop that could be responsible for this error “100% disk usage on Windows 10”. So, you can try to stop your Windows Search feature temporarily to check if it is the main reason for this problem.
To stop the Windows search feature until the next restart, you can use command prompt very easily. The procedure is given below.
- Go the Windows Search bar and search for Command Prompt.
- Right-click on the Option and click on Run as Administrator.
- Then input this line and click Enter “net.exe stop “Windows search.”
After doing this, check for the issue if it is happening again. If it is gone now, you can disable this feature permanently. To do this, you can follow the procedure given below.
- Press Windows Key+R to Open Run menu
- Fill services.msc and click Enter
- In the Service windows, Select the Windows Search option and double click on it.
- Under the Startup Type option, select Disable option and then click on OK.
This may be the permanent solution to this problem if this Windows feature is the issue behind your problem. In order to turn this mode off, you can go here again and Enable the Option.
If you are not getting this problem solved after disabling the search option temporarily and permanently, you may go to the next method, which is given below.
Change Energy Options

This is another great way to solve this 100% disk usage problem on Windows. So, you can try this too with your computer. The reason behind the problem may be the restricted settings for power consumption for some important functions.
So, follow the procedure given below and change the energy options.
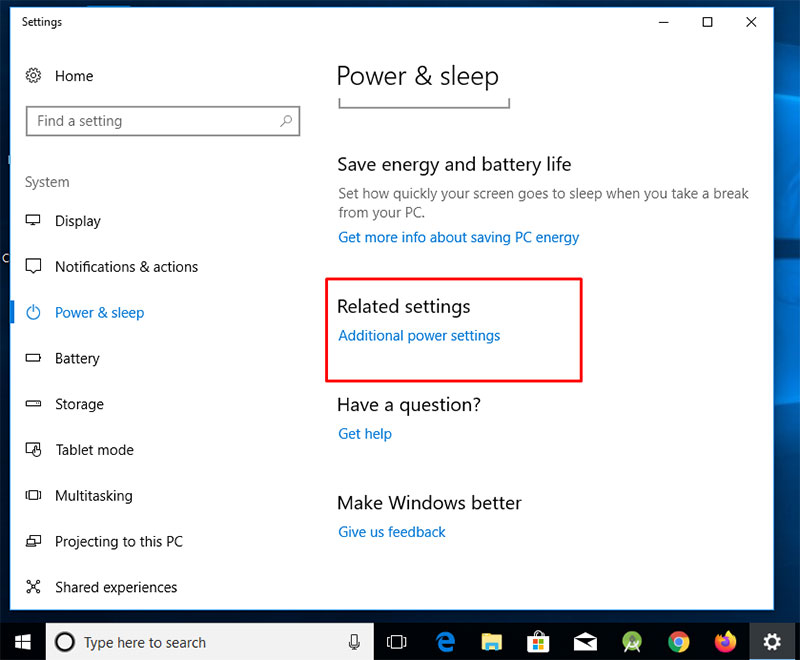
- Search for Power Options in the Windows setting bar
- Click on the Additional Power settings option.
- Then, click on Change plan settings and then Change Advanced power settings.
- After that, pick the High-performance settings option from the drop-down.
After doing all these things, you will have to come back and make sure that this plan is set as the default plan for your system. You may try to reboot your system after that to double-check the changes.
If the problem still persists, you may follow the next step.
Stop Superfetch Service
In the taskbar, Windows Superfetch service mostly allocates your disk usage and make your computer full of problems. However, disabling this service may not only help you to get rid of this problem but various other performance-related issues.
In order to disable this feature, you can again use the command prompt as we did earlier in the above step.
Search for the command prompt and run is as an admin. Then paste this line “net.exe stop superfetch” and click on Enter. If the problem is solved after doing it temporarily, you may follow the procedure which we used to disable the windows search option.

Although any of the given procedures will surely help you to solve this problem of disk usage in Windows, if it is not, you may go further with the next steps.
Turn Off your antivirus services temporarily
Third-party antivirus programs may cause this problem on your computer. However, if you have a simple Windows defender program on your computer, it can also cause some problems related to your disk.
So, you will have to try disabling it once. To disable Windows virus protection, you can follow the procedure given below.
- Search for Windows Security in Windows search bar
- Then click on Virus and threat protection.
- After that, click on Manage settings Option.
- Then turn off the Real-time protection option.
After doing this setting, check for the issue if it is coming again. If it still persists, proceed to the next method.
Reset Virtual memory
Resetting your computer’s virtual memory can also help you to solve this problem. This function allows your system to clean out the temporary files stored in your RAM.
Virtual memory problem? There are lots of problems which can be caused by these temporary files so try to reset it once by following this procedure.
- Go to your computer’s System Properties menu and then click on the Advanced System settings option
- On the next screen, click on Settings in the performance section.
- Then click on Advanced and then click on Change.
- Check this option “Automatically manage paging file size for all drivers.”
- Also, choose No Page file and click on Set.
This method may also help you to get rid of this problem. If it’s not, go to the next step.
Run Check disk
Check disk features enable the Windows users to detect various problems occurring in their computer related to the physical disk drives. In order to run this test, you will have to follow some steps which are given below.
1. Go to Windows Explorer and right-click on C Drive. Then click on Properties Option.
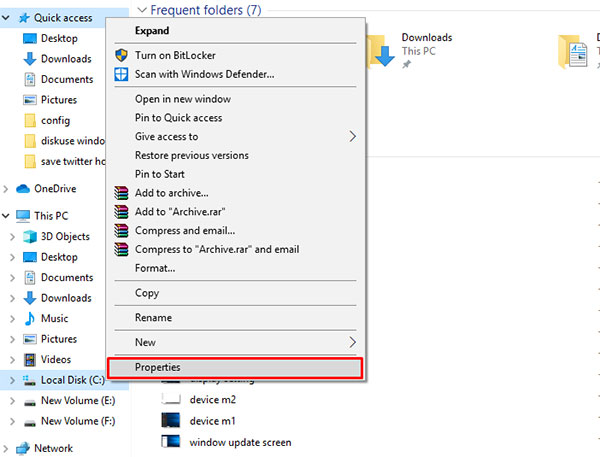
2. After that, choose the Tools tab and then click on Check.

The computer will start to scan the drive and detect the possible issues if your disk is having one. This may give you some potential problems that are causing issues with your hard drive.
You can also choose for schedule disk check option for regular disk checking. However, in order to see if the problem is caused by the physical disk problems, this feature will help you for sure.
Read More:
- 16+ Atom Quad Core Vs. Celeron Dual Core Comparison [Unfailing details]
- [8 Exclusive Steps ] Fix second monitor detected but not displaying on windows?
Wrapping Up
We hope all these steps will help you to get your problem solved easily. Most of the time, this problem, known as 100% disk usage on Windows 10, is caused by internal issues.
But, even after performing all these steps, if you still have this issue on your computer, you may have to take it to an authorized service center. They may be able to get it solved for you.
Along with this, you can contact your computer or laptop’s care center or tech support services. They may be able to guide you through any specific problem with your computer’s model.
We hope this article has provided you enough guidance to solve this problem. So, make sure to share your feedback in the comment section. We will try to help you with anything you want.
Also, share this article with your friends so that they can get help regarding this problem. We keep coming with various other articles related to Windows, the internet, and technology. So, stay tuned to get more information about these articles.