
Nowadays, there is so much readily available content on the web, and you’ll need to use all the tools at your disposal to make yourself stand out. To get the hype train going, you need to stay ahead of the curve, which means investing in your site, raising brand awareness, and building a web presence even before your website goes live.
The best way to do so is with an “under-construction” page. Such pages act as your placeholder, advertisement, referral link, and so much more, all rolled into one. You can create them manually in the default WordPress editor, but why should you?
The editor’s options are severely limited compared to specialized plugins, and you’ll have to possess significant knowledge to do it right (it’s not as simple as publishing a regular page).
With that in mind, we’ll focus on one of the best plugins on the market, UnderConstructionPage, and break it down step-by-step until the final product is revealed.

Through our example, you’ll get to see first-hand how easy it is to go from an idea or a concept to realization when you have the right tools for the job.
For this particular example, we’ll be creating an under-construction page for a travel website.
Table of Contents
First Steps in Your Journey
Once you’ve downloaded and installed the plugin, the first thing to do is check out all the settings (this should be your rule of thumb with any plugin). From adjusting the appearance to turning the page on and off, you can find everything that’s relevant right here.
There’s no need to worry if you haven’t used such a plugin before because most of the work you’ll do along the way, making more extensive and more minor tweaks to the default values.
We recommend checking out and adjusting the start and end dates first before creating your page. By doing so, you can display a handy countdown on your page.
Also, it’s good to note that user roles will get to bypass the page and get to all the other pages – which we’ll talk about a little later. After the small details are done, you can dive deep into creating your very own “under-construction” page.
Exploring the Themes
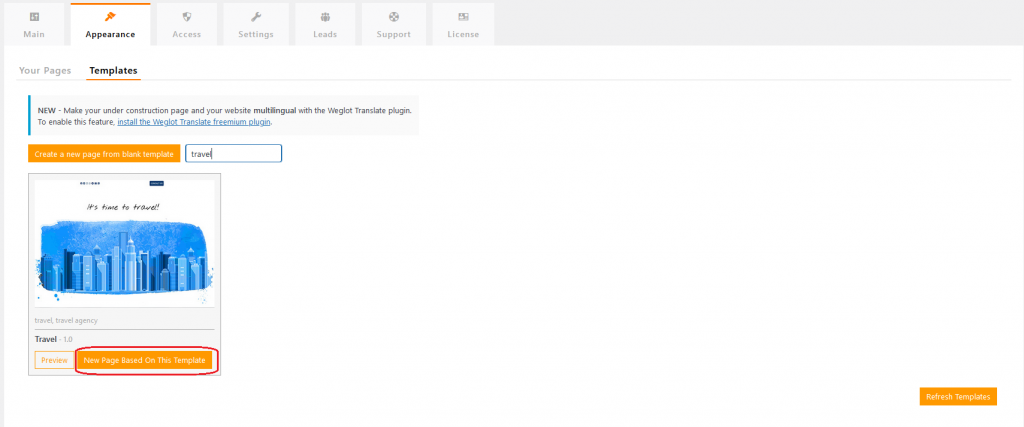
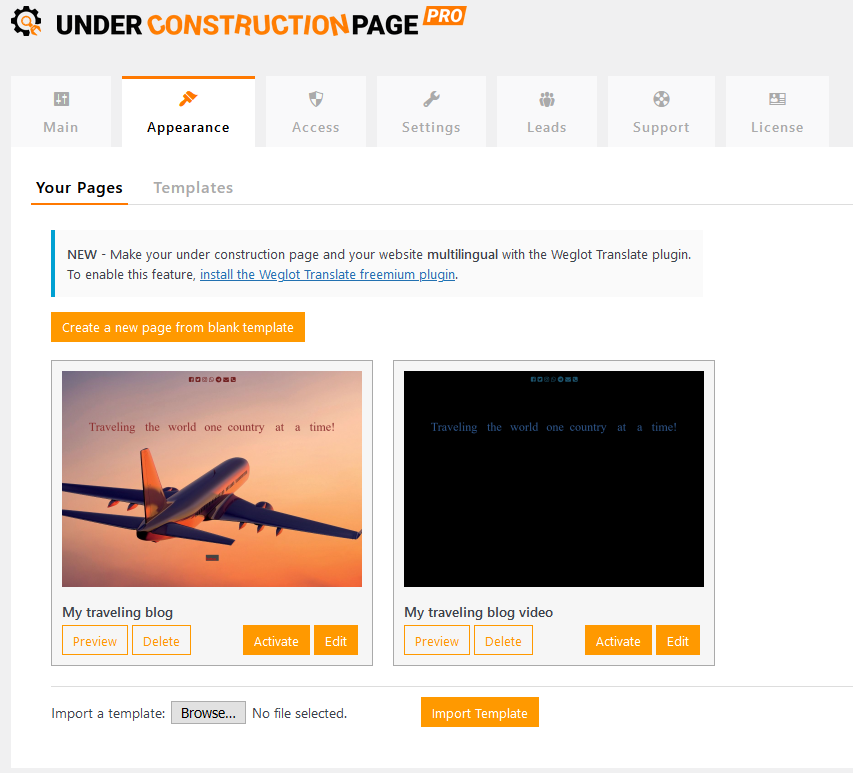
By going to the appearance tab, you’ll get access to a wide variety of pre-made templates you can use in your work. There is truly something for everyone, from sports and fashion themes that look realistic and sleek to cartoonish ones.
As we’ve mentioned, today we’ll be creating a page for a travel website. We’ll filter just the pages we will be using to weed out the unnecessary options – all the themes have tags, and navigating through them is a breeze. Once you’ve made your choice, you can start the editing process by clicking on the button below the preview image.
Once you click on the button, the editor will open, and you can immediately go through all the changes you’ve envisioned. While very easy to use because of the drag-and-drop nature of the editor, it’s still a robust tool with many functions you can use to improve the default settings.
So let’s start!
Customizing the Look of the Page
The first things to take care of are the least flashy and serve more as a general information section from the backend for easier handling. The section is aptly named “page properties” and has everything you associate with properties prompt on a random file or folder.
You’ll need to define the template name, page title, and page description with added customization options provided with the use of custom CSS and various background selections.
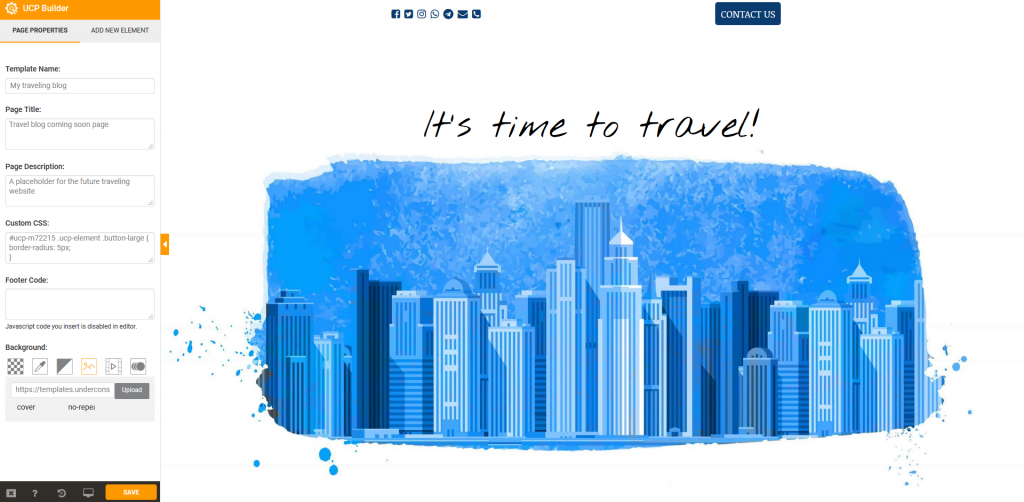
In our default template, the background is a still image, but it can also be transparent, a solid color, gradient, a video, or an animated picture. Whichever media you’re going with, always think of the contrast; you want the content to be visible. However, don’t obscure the image you’re using (if you’re using a simple, solid color background, there should be no issues).
The heading is at the center of your page and should represent something important such as your site’s name or a phrase encompassing your brand. Since the main editor is set up of blocks, it’s easy to add or remove them, place them around the page, and edit them by clicking on their icon. As you would expect, text boxes have regular editing like font, color, size, etc.
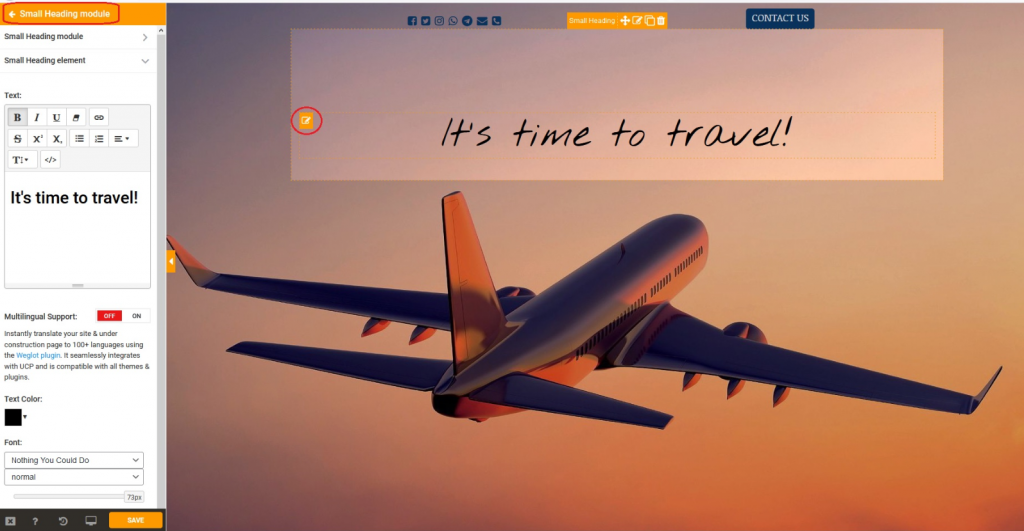
All the things we’re tackling first are either incremental to the page being set up right (properties) or elements already present within the template we’ve chosen (small header). Still, the fun part begins when we start adding more elements to the template.
Adding Elements to the Page
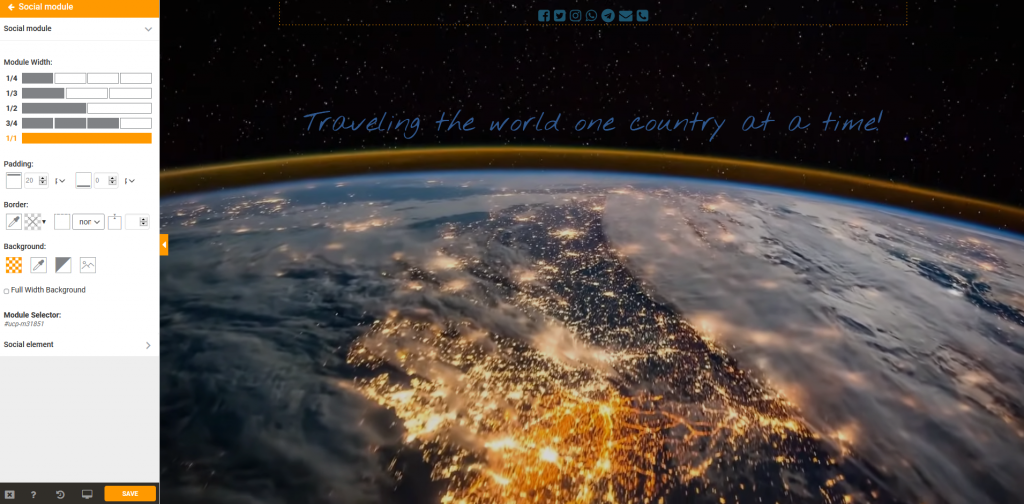
The ever-important social media icons should be present on every page of your site, especially the one you’re trying to put into the spotlight. By adding the module, you can position the icons and resize them to fit the page best, set the padding and border, or give them a background.
On the other hand, the social element tab lets you choose which social media icons you’ll use, along with their size and color. Connecting your accounts to the icons consists of simply adding your accounts to their respective icons and ticking them, displaying them on the final product.
![]()
To get elements where you want them to be, it’s crucial to use dividers. That’s why when adding an element, like a countdown timer or a button to the page, we will use the divider element below our heading.
If you’ve ever used any block editor like Gutenberg in WordPress, you’ll get the hang of it rather quickly, making navigation second nature.
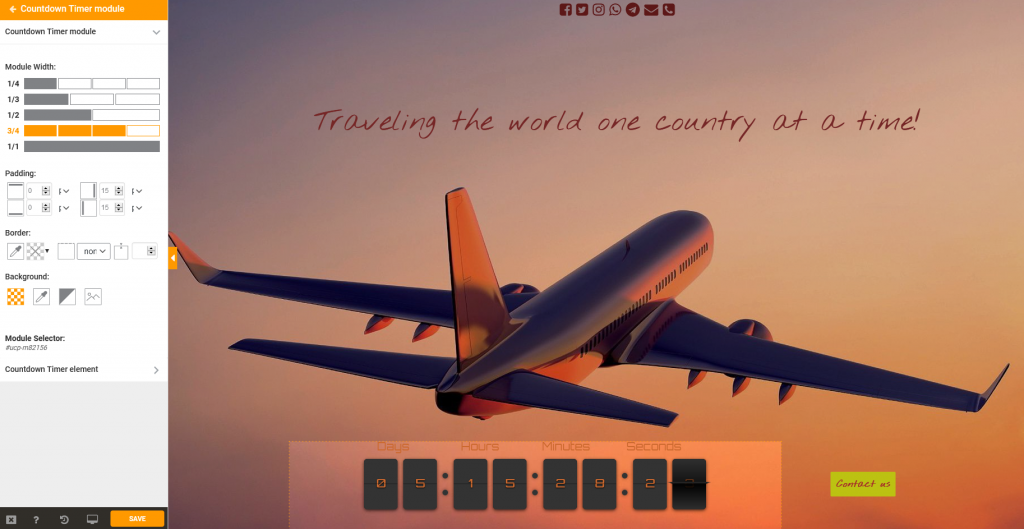
Keep in mind that dividers only work for horizontal positioning, while vertical positioning is done solely through width adjustments. Through model editing, you can set how much of the page an element will occupy – width can be separated into quarters, thirds, halves, or not at all.
Depending on the element, you’ll be using these throughout your editing. If you make an element use the entire width of the page, you can’t put any other element in the same line, only above or below. Still, theoretically, if you place elements into smaller sections, you could put four of them in a single line.
Choosing the Perfect Background
Using a still image for a background that will serve as the focal point of the entire page is one way to go, but since we’re living in a time ruled by multimedia, why not go with a video background.
There are some clear advantages and some apparent drawbacks that will come up if do decide to go this route – let’s first focus on the good.
It’s undoubtedly more dynamic than a still image could ever be. If you’re looking to convey more than one idea to your visitors, you can do it much better with a video. While it’s certainly more dynamic, it’s also arguably more striking, especially if you’re using the right video.
However, there are some very unique images out there that could debate the statement. The only thing that you need to remember is to use a high-res video to show off. If you present some low-res pixelated mess to your visitors, there’ll be absolutely nothing to entice them to visit your site once it’s ready.

On the other hand, the drawbacks stem from the nature of the format. It’s a video, so there are virtually no customization options within the editor, unlike an image background where you can change certain aspects.
Also, it’s dynamic, which is excellent for effect but not so great for content you put on top of it. Since the scenery is changing, you’re forced to go very minimalistic with your elements to make the video visible.
Moreover, the changing nature of the background means you’ll have to use prominent colors, fonts, icons, etc., so they don’t get lost on the page.
After Editing
Once you’re done with creating your pages, you’ll get to see them all in one place, similar to the template repository that comes with the plugin. Note that they’re not automatically activated; you will have to start the pages manually.
Before activating the page, you can preview how it looks from the frontend to the visitor, so you can make some last-minute finishing touches if they are needed.
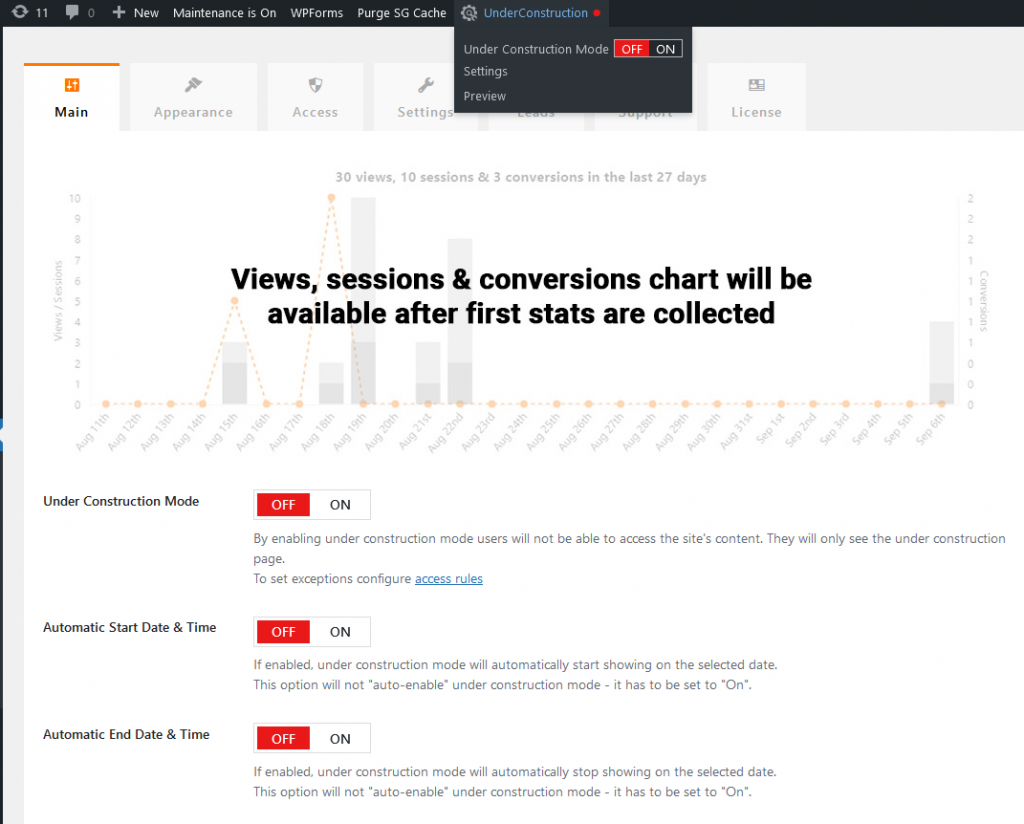
With you being done with the creative part of the job, all that’s left to do is go back to the plugin settings and make sure everything is running smoothly. The obvious thing to do is make your “under-construction” page active.
To do so, you can outright turn it on, or you can schedule an automatic start or end date if you already know precisely how your timetable is going to unfold. Additionally, there’s a button on the very top of your dashboard that’s added to the menu bar where you can instantly turn the page on or off at any given time.
Now that you’ve activated the page, it’s time to set up a whitelist of users that won’t be presented only with that page but will still get to see the “regular” site that’s a work in progress. Naturally, you can skip this if you’re the admin and the only person that works on the site.
However, if multiple people have access to the backend, it’s prudent to assign roles to each of them (you can even add a password for access).
While usually used to build up hype for your site, “under-construction” pages can also, unfortunately, have a role in disappointing potential visitors. They could be searching for something, only to get to your page that is still just a placeholder for the real deal, and therefore alienating any future visits.
Luckily, developers are familiar with this type of issue and have inserted a function to discourage search engines from presenting your “under-construction” page instead of the regular site. We advise you to use this function only after you’ve done some research on how it will affect your traffic in the long run.
Summary
As we mentioned earlier, to do a good job of creating your “under-construction” page, you need the right tool. The tool needs to be approachable, with a user interface that’s easy to understand and simple to master.
UnderConstructionPage offers all you’ll need to create unique pages with no coding knowledge whatsoever, checking all the boxes when searching for the perfect plugin. If you’re looking for something fast and reliable, be sure to check it out!