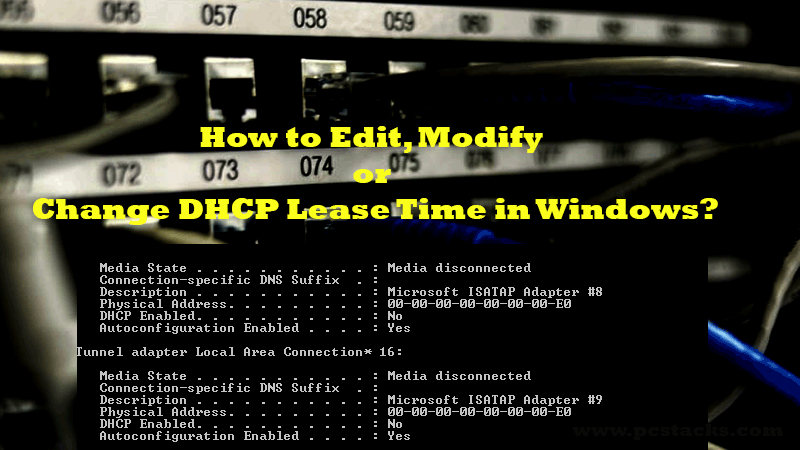
It is never easy to understand the working of network proxy in windows and especially the IP addresses. You should have deep knowledge about networking if you want to play with IPs. However, we are going to be discussing a very important and popular topic which will surely help you with numerous things. We are going to know how to change DHCP lease time in Windows.
We will know how you can check your DHCP time and how to modify it. This concept can be pretty helpful for anyone who is a hardcore internet user and do various kinds of browsing, gaming, and downloading tasks.
If you are someone who needs constant internet access from a single IP, this article is going to help you with the same.
DHCP is a popular IP assigning technology for dynamic assigning. It means that once you get an IP assigned from your ISP, it will get changes after some time. And the time it will take to get changes is called DHCP Lease time.
So, it could be a very important thing when you want to connect your computer to the internet with the same IP address for long periods of time.
But, unfortunately, most of us are not aware of how to do the same. You might think that it will be working fine with the help of your computer itself. But, it’s not true. Your computer has nothing to do with the internet IPs.
In fact, you will have to play with the router configurations to do the same. If you are aware of the process, you may get nothing more than that in this article.
However, we will be discussing some other topics here which you may find interesting to read.
You are going to know how to check the IP assignment and expiry time using the command prompt. Also, at the end of this article, you will get information to easily modify that time to your desired time frames.
We will be going to know about other things like the benefits and different processes.
So, it will be a good thing if you keep reading this article until the end. We will make sure to cover as much as possible.
Table of Contents
What is the DHCP Lease Time?
DHCP (Dynamic Host Configuration Protocol) is a service used by most of the networks to assign IP addresses automatically to the devices. This technology uses dynamic systems. So, any IP assigned to your computer, smartphone, scanning printer, or any other device will never be permanent.
Because each device will need an IP address to connect to the internet or with each other, it becomes an important part of any network. But, if we talk about the DHCP lease time, you can imagine its meaning just by its name.
Whenever you get a new IP assigned for your device, it will stay the same for some time. And the time between the assignment and expiry is known as the DHCP lease time.
If the lease time is very low, your internet will disconnect after some time when the ISP is assigning it a new IP.
This is the reason why this is an important factor when you are working with processes where continuous access to the data is required. However, if you want, you can easily change this time and also check the current time frame. This is all we are going to discuss further.
The best lease time for DHCP (What’s the timeout configuration)?
The best DHCP lease time will depend on your specific requirements. So, if you are looking to have a constant internet connection for heavy downloading or gaming, etc, you will surely need a good amount of lease time.
However, if you are a normal internet user, you will have no need to worry about this concept. In fact, most of us are never aware of the fact that there is a DHCP time which will matter when you use the internet.
But, if we consider the home networks, having the default 24 hours lease time is good.
If you are connecting three or four devices at the same time to a network, there are no issues with this amount of lease time.
Some users may want much more lease time duration, so they can set a limit of multiple days if they want.
So, just understand your needs before you finalize any specific lease time frame for your network connection.
How to find the default DHCP Lease Time in Windows?
As we have discussed earlier, you can easily check your lease time with the help of a command prompt. In fact, the command which we are going to use for the same will give various other information. But, we are going to simply use it for the process we are here.
The process is very simple to follow and anyone can perform this method. You just have to open the Command prompt and run this single command.
Let’s see how you can do it.
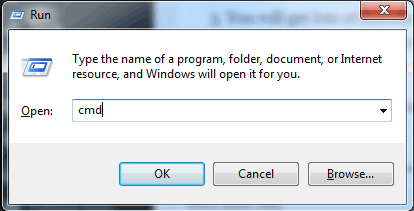
- Press Windows + R keys together on your keyboard and type cmd and then hit Enter
- Inside the Command Prompt window, enter this command ipconfig/all and hit Enter
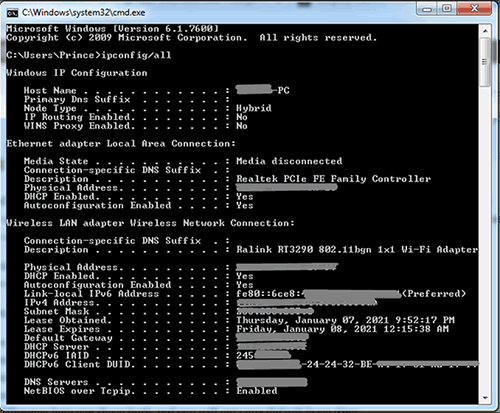
- You will get lots of information about your connection and IP
- Find the section which says Lease Obtained and Lease Expired
- Calculate the difference between these both and you will get your default lease time
You will notice that you are actually seeing the time when you got your IP address assigned and when it is going to be expired.
It can be less than 24 hours or more as per your network. But, this is to help you easily identify how you can check that out.
How to renew the lease time on Windows 10?
Suppose you have got your IP assigned yesterday and your expiry time is going to be after one hour. Now, if you want, you can renew your lease time now and start the new timing from now.
In this way, you have got something important to do, you have enough time to spend on that. So, it could be a very helpful thing to do and make your reassigning task pretty easy and effective.
Fortunately, this can be done using a couple of commands. Just like the above step, we are going to use the command prompt in order to reset your lease time and get a new one.
Let’s see how you can do that.
- Run Command Prompt using the same process we discussed above
- Now, enter this command first of all and hit Enter
ipconfig/release
- After this, run this command:
ipconfig/renew
- Now, you can follow the same procedure to check your new lease obtained and lease expires time
So, this was the process of renewing your DHCP time and get a new time to work with.
What happens when the DHCP lease time expires?
From our previous conversations, you might be aware that when the lease time expires, you are going to have a new IP assigned by your router. In fact, this is actually what happens at that time.
So, when that expiry moment arrives, your system or device will ask your router to provide a new IP.
At the same time, it will release the earlier IP it was using with the same connection.
If the router agrees, you will get a new IP and this all will happen within seconds. So, you might not see that happening anywhere.
Except you can observe it using your command palette. But, this process is being done by DHCP so you will get any random IP that is available at that time.
So, if you have set a custom time frame for your lease time to expire, it will expire at the same time and you will get a new IP at that time as well.
How to change the DHCP Lease Time?
You can use two different methods to change your DHCP time. The first method is by using your router configuration panel and the second one is with the help of a DHCP server. We are going to cover both the steps here one by one.
However, the method which uses the router is the best one for sure. So, before starting with that one first, we need to know why to change DHCP lease time.
Why do you want to change your DHCP lease time?
Your IP address plays a very important role in order to make your internet connection working appropriately for your desired tasks. In fact, you would need a constant IP address configuration if you want to play games properly.
Also, if you are downloading a file with non-resuming capability, you would need a connection that isn’t changing over time.
There are various other things and situations where you may feel the need for a constant IP address and a good lease time.
Sometimes, with a very short DHCP lease time, you can lose your files or get locked out if you are working on some specific websites or software.
We can say that it is always better to have a good amount of lease time so that you can ensure proper reception and delivery of your desired contents.
If you want to do the same and change your DHCP time, we are going to help you with that as well. Let’s get started.
1. Using the Router settings
There are various types of routers available in the market. So, you might be using any of those. However, the settings will surely be pretty much identical to the ones we are going to discuss here.
We are going to take the example of an Asus router. So, if you also have this type of router, you are at the good end. However, you can imitate the same settings on your available router and they will work fine.
Once you have reached that interface, you have the freedom to set that limit to your desired values.
Also, you can change them later on if you want. Now, without any further discussions, let’s get started.
- Login to your router dashboard using its address
- Enter your credentials and log in to the dashboard
- Inside the interface, go to the LAN option
- Under the LAN menu, select the DHCP Server tab
- Inside this menu, find an option named Lease time
- Change that time to your desired time frame which you want to set as your DHCP lease time
- It will ask for the time in seconds. So, keep that thing in mind
- Now, save the settings and quit that session
Now, once all these settings are done, it is important to restart your router to save the settings. Once it is rebooted, you can run the command prompt and enter ipconfig/all to check your current DHCP lease time.
You will surely be able to see the new time you have currently set.
What is Max lease time in the router?
By default, all the routers will come along with a standard lease time of 24 hours. But, if we talk about the DHCP guidelines, we can set a lease time of up to 46, 710 days.
So, you can use the same IP for this amount of time as per the router configurations. Of course, various other factors will work together to make this happen and because of some other things, you might have to get a new IP assigned.
If we talk about the general rules, these are the specific time frames you can set on any router. So, if your router is allowing you to do so, you can set multiple days and even weeks as your DHCP lease time.
Most of us will never set that maximum time frame as our lease time but you may need some days and you can do the same without any issues.
However, you will surely be looking to know how to do it and we will surely discuss it below.
2. Changing the lease time using DHCP Server
If you have got a dedicated DHCP server, you can use it to change your lease time as well. Most of the users may not have access to it but it can be a very helpful method to change your lease time.
Although the above method will work for most of the home users, this one will be suitable for large corporations where they have their own DHCP servers assigned to them. As a DHCP client, you can easily change that time and get your desired set of times when you will get a new IP address.
The process can be a little bit tough as compared to the previous one. But, let’s get started with the same below.
- Press Windows + R keys together to open the Run dialog
- Now, enter dhcpmgmt.msc and hit Enter
- Find the DHCP scope for which you want to change your lease time
- Now, find the Lease Duration for DHCP clients option
- Enter the lease time you want to use in the Limited to field
- Save the changes and restart your computer
After doing this, you should be able to change your lease time without any hassles directly from your DHCP server. This is perhaps the most reliable way to do this thing.
How do I remove a bad IP from a DHCP server?
This is another important and big question that comes along with the one we have discussed here. In fact, you might feel the need of removing various IP addresses at various instances. So, you should be aware of the process of doing the same.
This can happen various times. It is possible that you are facing various issues with a certain IP. The most common problem is slow speed and lots of traffic.
So, if you want, you can easily delete that IP and get a newly assigned network. And, this will work very fine.
You will be able to use the internet in a proper manner in the way you want. So, you should know the whole process of doing the same.
We are going to do this here. So, let’s get started.
- Get inside your DHCP manager and select the Addresses tab
- Now, select the IP addresses network
- Choose one or more IP you want to delete from the list
- Go to the edit menu and select the delete option
- You can also delete the hostnames from the host table if you want
- Once everything is done, press enter
This was all about removing the bad IPs from the list of addresses. However, you should pay close attention to the IPs you want to change using this method.
It is good to confirm twice whether you want to change a certain IP or not.
Is DHCP lease time important in-home networks?
When you are using the internet for general purposes like surfing the internet, social media, streaming, etc, DHCP lease time doesn’t matter so much.
Because you can do all these things even with continuously changing IP addresses, you are going to be good with that. You can imagine using the internet on your smartphone using your sim card.
Those IP addresses change very frequently. In fact, they can change multiple times within an hour.
So, you hardly face any kind of issues with that. But, surely it will show its impacts when you are downloading files or doing any other important tasks which require the same IP for a longer period of time.
Gamers, content creators, network administrators, and various other people are are there who will need long lease times and they must have proper preparation for the same.
Changing that time frame is not enough. You must have a proper ISP that supports the same for you.
So, keep all these things in mind when you have an advanced application for which a long lease time is required.
When you should connect with a professional?
If you have followed the whole procedure properly and you are still not seeing any change to your DHCP lease time, you should surely get in touch with a network expert who can look deeply into this matter.
You can get in touch with your ISP and let them know about your needs. They can help you better with the same in a better way. You can call their customer support and let them know about your IP requirements.
Also, if you are facing some issues after changing those preferences, you will have to get in touch with an expert again. So, if you do not want to do anything by yourself and you have got free customer support with your internet connection, just let them know about it and they will provide you with the support you are looking for.
Final Verdict
Do we hope you are now aware of how to change DHCP lease time in Windows 10? We have covered all the steps in detail and provide you with everything you will need to get this done. However, we suggest you follow these procedures properly so that you face no hassles at all.
Doing all these steps is very easy and anyone can do it. But, if you are stuck at any step, just leave that right there. We know all routers are not the same and we can’t cover the steps for everyone in a single article.
But, you can search the internet and you will find the help you need.
If you have liked this article, make sure to share it with others as well. Also, consider giving us your valuable feedback in the comment section. We will surely love to hear from your side.
You can give us suggestions about any improvement, complaint, or query related to our content. We will make sure to help you with everything we can.
If you want to write to us on any specific topic, please let us know. We keep coming with regular articles on various technology and software topics.
So, stay connected with us for more.